
3D printing exhibit 1; Headphone holder
As I said in my last article Prusa MK3S+ 3D printer - assembly and first prints, I've made a list of ten things to print. Here is the first one.
I use headphones with my computer, and it is really annoying to have them on the table and generally get in the way when not in use. Historically, I just put a screw to the side of the table and hang them on the screw, but this was not ideal, as I discovered when I stabbed myself with the screw. It is small and not really noticeable. When you are not careful, it is really easy to impale yourself onto it.
Naturally, one of the first things I wanted to print was the holder for the headphones, because it would immediately solve one of my needs. I've measured my table and my headphones, and came with two ideas:

The only difference is how the holder should hold on the table. First one uses a spring, second some kind of screw.
Blender
I've created one big cube for the table and a second smaller cube for the holder. I've set the dimensions I wanted, and then did a boolean difference operation on the holder cube.
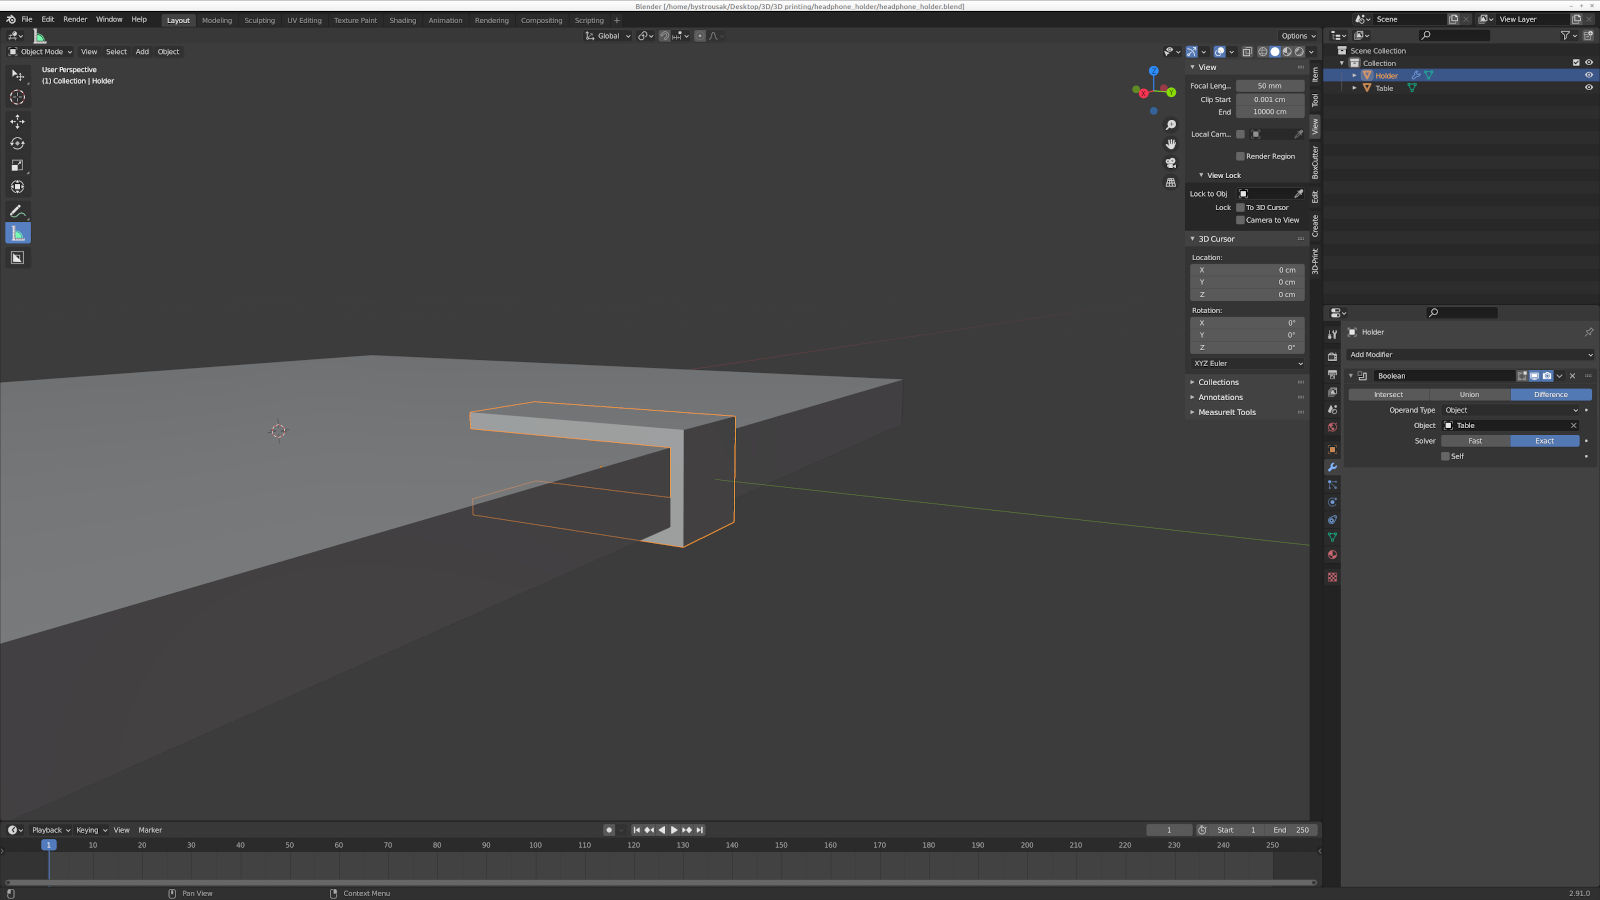
I've extruded the face on the end of the holder and added a second boolean cube with dimensions of my headphones to create a hook:

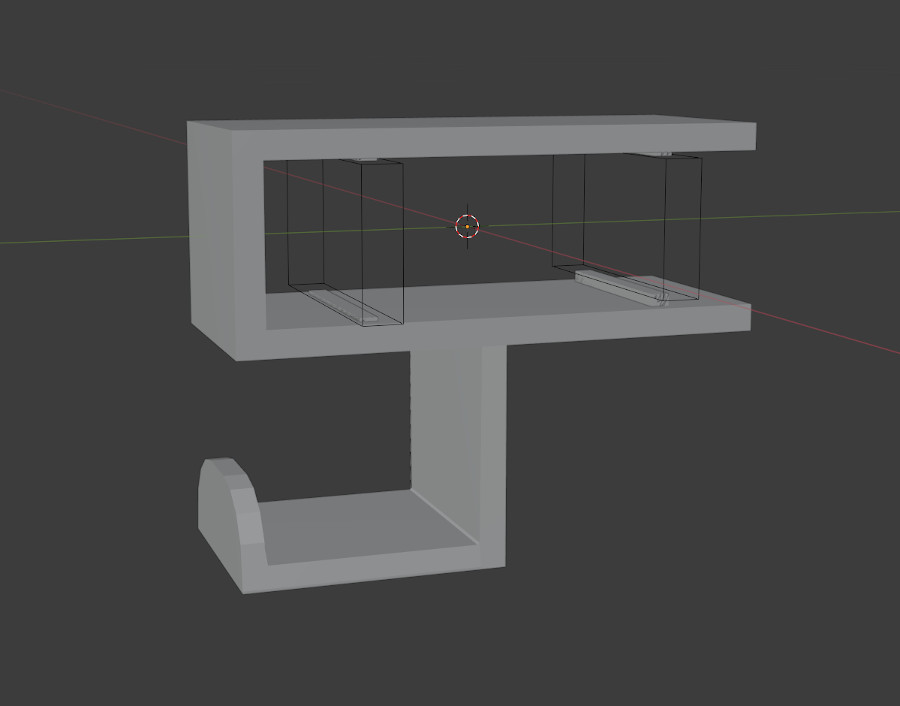
I've added a few bevels and a spring which should make the holder to stick to the table better. Here is the final result:

Originally, I wanted to put a spring on the top part, but then I've realized that dust and other stuff would collect in the spaces between the body of the holder and the spring, so I've decided to put it down.
This was really just a first prototype, it was clear to me, that I'll have to change some things when I'll see how it behaves when printed.
I wanted to print the model from the side, but PrusaSlicer did a weird thing and removed the spring each time I've tried that:

I mean the spring was there, but when I've rotated the component, it suddenly wasn't. Weird.
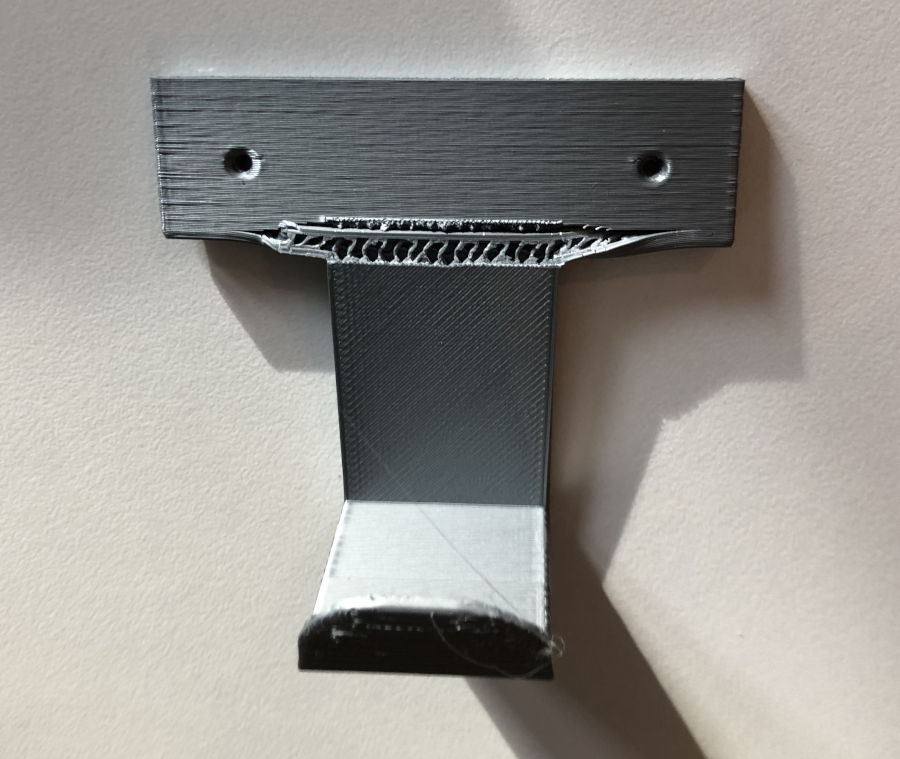
In the end, I've ended up printing the first prototype with a lot of supports, which is something I've tried to avoid. But the spring is there, so whatever.

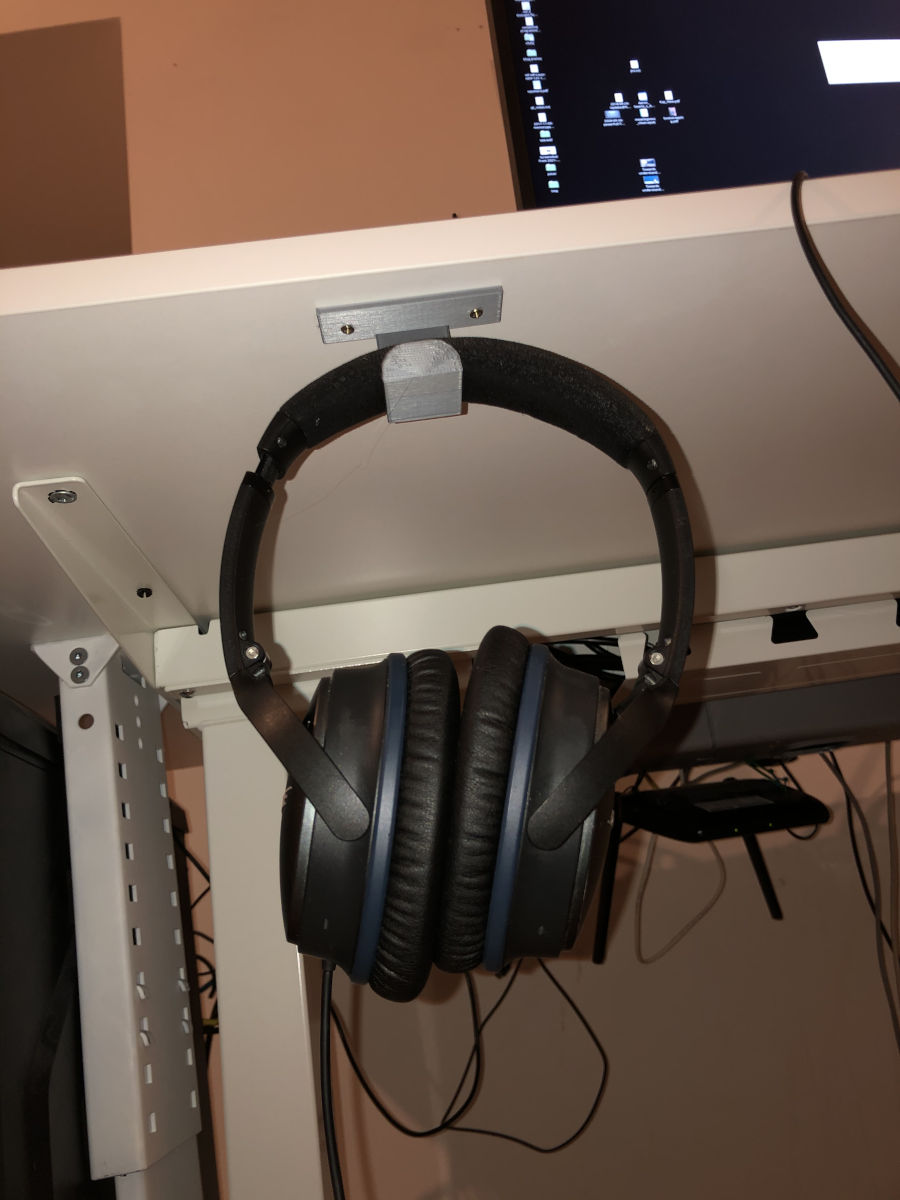
Here is the printed item:


It was quickly clear, that this is not the most optimal shape, the body is too thin and I also don't like how it sticks from the table. It was also clear, that I was locked in the old way of thinking, inspired by the screw, which was put into the side of the table.

And the little spring at the bottom of the part is not useful at all.
Mk2
With the practical results from the Mk1 print, I've decided to try another approach with the holder, and modified the shape to this:
It took me several iterations, but it worked fine and printed relatively quickly, because there was no need for supports.

Mk3
I've made a final low-quality version of Mk2, with various adjustments (size of the bumps), and I was quite happy with how it works, so I've used it. But after a day or two, I've noticed that it doesn't hold as good as it used to. Here is the reason;

It turned out, that PLA bent and didn't retain its flexibility. So back to the drawing board Blender. Here is the Mk3 version. I've decided to stop trying to make the holder temporary and screw it to the table:

This kinda worked, but then I rotated on my chair and accidentally kicked the holder and broke it:
The solution to this problem was really simple, just add angled support which will give it more rigidity:


This works great. I've tried to break the piece with my hands and I couldn't do it, so I think it can now survive accidental kicks.
Conclusions
Although it may seem like my approach was kinda wasteful, I really love how the ability to make quick iterations enabled me to learn something new and quickly obtain new skill and feel for how to optimally design stuff for 3D printing. To see what's possible and what's impractical.
It also allowed me to try to see how much practical is the design and to quickly improve it to a usable version:

I also really love how you can turn an idea into a matter in such a short time.
